Chocolate Bun Delight: The Ultimate Recipe for Chocolate Lovers
We're excited to share our easy chocolate bun recipe with you. It's perfect for any occasion. Whether you're new to baking or have lots of experience, our guide will help you make delicious chocolate buns. These buns are soft, fluffy, and filled with rich, velvety chocolate.
💡Looking for the essentials? Find everything you need here before diving into the details
Overview Of Content | Summary Recipe | Key Takeaways
📋 Overview Of Content
- Gathering Your Ingredients
- Essential Equipment and Tools
- Easy Chocolate Bun Recipe: Step-by-Step Guide
- Mastering the Perfect Dough
- The Art of Chocolate Filling
- Baking Secrets and Timing
- Decorating and Glazing Options
- Optimal Storage and Handling Tips for Chocolate Buns
- Understanding the Magic of Chocolate Buns
- Conclusion: Enjoying Your Homemade Chocolate Buns
- FAQ
📋 Recipe Summary
Recipe Summary: Chocolate Bun Delight
- Recipe Title: Chocolate Bun Delight
- Total Preparation Time: ~ 2 hours
- Yield: ~ 8-10 servings
Main Ingredients:
- ~2 cups all-purpose flour
- ~1 cup granulated sugar
- ~1 teaspoon active dry yeast
- ~1 cup milk
- ~2 large eggs
- ~4 tablespoons unsalted butter (melted)
- ~1 cup High-quality chocolate (milk or a mix of milk and dark chocolate)
🍫✨Feel free to adjust the amount of chocolate to suit your cravings! Whether you want a little or a lot, tailoring it to your taste will make these delightful buns even more irresistible. Happy baking!
Preparation Steps:
- Preheat the oven to 375°F (190°C). (~5 minutes)
- Mix dry ingredients: flour, sugar, and yeast in a large mixing bowl. (~5 minutes)
- Whisk wet ingredients: eggs, milk, and melted butter in another bowl. (~5 minutes)
- Combine the wet and dry ingredients to form a smooth dough. (~5 minutes)
- Knead the dough for about 10 minutes until smooth and elastic. (~10 minutes)
- Let the dough rise in a warm place for about 1 hour, or until doubled in size. (~60 minutes)
- Punch down the dough, divide it into 8-10 pieces, and shape them into balls. (~5 minutes)
- Flatten the dough and place chocolate chips in the center, sealing the dough around the chocolate. (~10 minutes)
- Place the buns on a parchment-lined baking sheet and bake for 15-20 minutes, or until golden brown. (~15-20 minutes)
- Cool the buns on a wire rack for a few minutes before serving. (~5 minutes)
Equipment Needed:
- Mixing bowls (for wet and dry ingredients)
- Measuring cups (for accuracy)
- Baking sheet (for baking the buns)
- Parchment paper (to prevent sticking)
- Stand mixer (optional, for kneading)
Main Tips:
- Ensure the dough is smooth and elastic by kneading for 10 minutes.
- Proof the dough in a warm, draft-free spot for best results.
- Use high-quality chocolate for a richer flavor.
- Keep an eye on the buns while baking to avoid overbaking.
Serving Suggestions and Pairings:
Serve your chocolate buns with a hot cup of coffee or cold milk for a perfect treat! These buns are ideal for breakfast, brunch, or a snack.
If you're a chocolate lover, these buns will be a hit. After a savory meal like our Pasta House Co. Salad, this is the perfect dessert to satisfy your sweet tooth.
To balance out the richness of these buns, why not serve them with a refreshing blue razz ice juice that’s as sweet as it is invigorating?
✅ Discover all the secrets and tips by reading the full content!
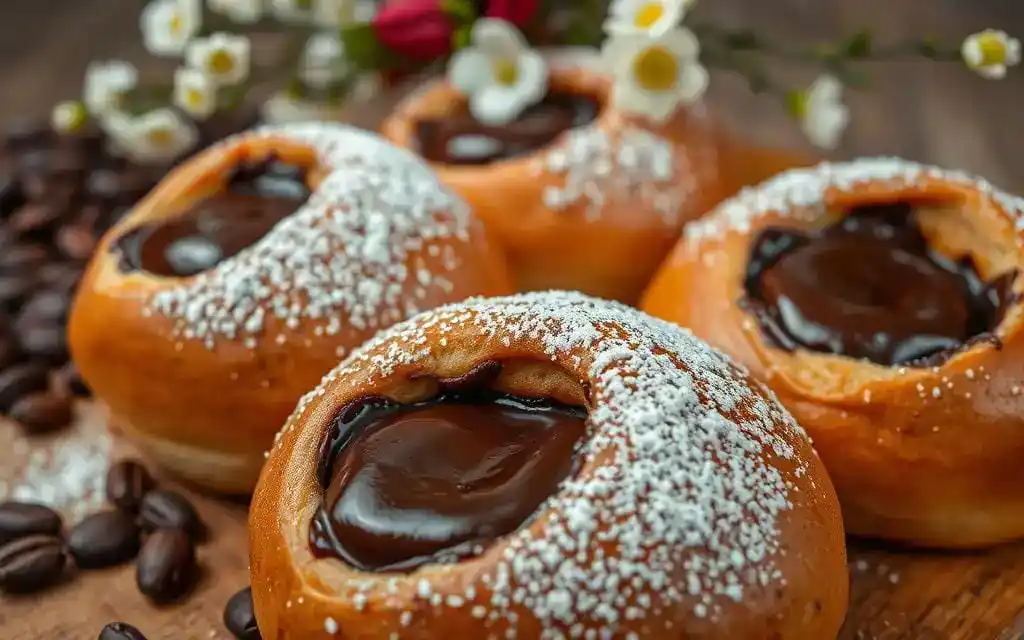
Imagine biting into a warm, freshly baked chocolate bun. It's filled with a gooey chocolate center. Our recipe lets you enjoy this treat whenever you want. We'll give you all the instructions you need to make these delicious buns at home.
So, what makes our recipe special? It's simple yet effective. This way, you can enjoy baking without getting stuck on complicated steps. We want cooking to be fun for everyone, and our chocolate bun recipe is a great place to start.
Key Takeaways
Key Takeaways
- We'll provide you with a simple, easy-to-follow recipe for delicious chocolate buns
- Our recipe includes step-by-step chocolate bun instructions to ensure you get the best results
- You'll learn how to make soft, fluffy, and flavorful buns filled with rich, velvety chocolate
- Our easy chocolate bun recipe is perfect for beginners and experienced bakers alike
- We'll show you how to create mouthwatering, delicious chocolate buns that are sure to impress your family and friends
- With our recipe, you can enjoy homemade, delicious chocolate buns whenever you want
Gathering Your Ingredients

To make our tasty chocolate buns, we first need to gather all the ingredients. This step is key in our simple chocolate bun steps. It makes sure we have everything needed for a homemade chocolate bun tutorial. We're using a quick chocolate bun method, so having all ingredients ready is important.
Our ingredients will be divided into two groups: dry and wet. Dry ingredients include flour, sugar, and yeast. Wet ingredients are milk, eggs, and butter. We'll also use high-quality chocolate, which is a must for our chocolate buns.
Ingredients Table
| Ingredient | 8-10 Servings | 1 Serv. |
|---|---|---|
| All-purpose flour | ~ 2 cups | ~ 1/4 cup |
| Granulated sugar | ~ 1 cup | ~ 2 tbsp |
| Active dry yeast | ~ 1 tsp | ~ 1/8 tsp |
| Milk | ~ 1 cup | ~ 2 tbsp |
| Large eggs | 2 | ~ 1/4 egg |
| Unsalted butter (melted) | ~ 4 tbsp | ~ 1/2 tbsp |
| High-quality chocolate | ~ 1 cup | ~ 2 tbsp |
🍫✨Absolutely! You can adjust the amount of chocolate to match your cravings! Whether you want a little or a lot, tailoring it to your taste will make these delightful buns even more irresistible. Happy baking!
Feel free to adjust your recipe based on the quantities for 1 serving, and tweak them according to everyone's appetites for a perfectly tailored delight!
Looking for another indulgent dessert idea? These pumpkin treats are a wonderful choice for a cozy fall treat.
Chocolate Selection Guide
Choosing the right chocolate is important. We can pick from milk chocolate, dark chocolate, or white chocolate. For a classic taste, milk chocolate or a mix of milk and dark chocolate works best. Opt for a high-cocoa-content chocolate for richer flavor.
Tips for Quality Ingredients:
- Flour: Always use all-purpose flour for a soft and fluffy texture.
- Yeast: Use fresh, active dry yeast for the best rise.
- Butter: Unsalted butter is recommended for better control over the sweetness of the buns.
Essential Equipment and Tools
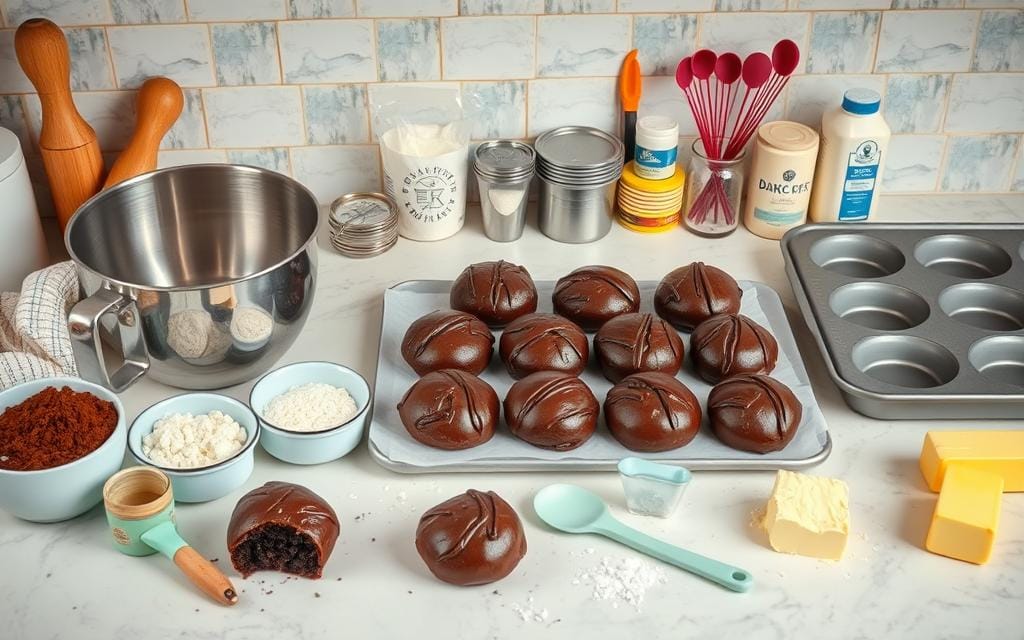
We think having the right tools is key for baking the best chocolate buns. We've listed must-haves like mixing bowls, measuring cups, and baking sheets. With these, you'll be ready to make a tasty chocolate bun recipe that will wow everyone.
Here are some key tools you'll need:
| Equipment | Purpose | Additional Tips |
|---|---|---|
| Mixing bowls | To mix dry and wet ingredients | Use stainless steel or glass for durability. |
| Measuring cups | For accurate ingredient measurements | Ensure to measure flour properly by spooning and leveling. |
| Baking sheet | To bake the chocolate buns | Line with parchment paper to prevent sticking. |
| Parchment paper | To line the baking sheet | Helps with easy removal and cleanup. |
| Stand mixer (optional) | To knead the dough | Ideal for quicker kneading, use the dough hook attachment. |
If some tools aren't available, no worries! There are other options out there that can get the job done just as well, so don’t limit yourself—enjoy trying out the available tools that can serve the same purpose!
By getting these essential tools, you'll be confident in following our tasty chocolate bun guidance. Remember, baking is about having fun and trying new things. So, don't be afraid to experiment and make mistakes.
Easy Chocolate Bun Recipe: Step-by-Step Guide
By following these simple steps and our quick method, we can make delicious homemade chocolate buns. Our tutorial will help you through every step, from getting ingredients to baking and decorating.
We're thrilled to share our easy chocolate bun recipe with you. It comes with step-by-step instructions to help your buns turn out perfectly:
| Step | Action | Time |
|---|---|---|
| 1 | Preheat the oven to 375°F (190°C). | ~5 mins |
| 2 | Mix dry ingredients: flour, sugar, and yeast. | ~5 mins |
| 3 | Whisk wet ingredients: eggs, milk, and melted butter. | ~5 mins |
| 4 | Combine wet and dry ingredients to form dough. | ~5 mins |
| 5 | Knead dough for 10 minutes until smooth and elastic. | ~10 mins |
| 6 | Let dough rise for 1 hour until doubled in size. | ~60 mins |
| 7 | Punch down dough and divide into 8-10 pieces. | ~5 mins |
| 8 | Flatten dough, place chocolate chips, and seal edges. | ~10 mins |
| 9 | Bake buns for 15-20 minutes until golden brown. | ~15-20 mins |
| 10 | Cool on wire rack for a few minutes. | ~5 mins |
| Total Time | ~2 hrs |
In a large mixing bowl, mix together the dry ingredients. This includes flour, sugar, and yeast. Make sure to use high-quality chocolate for the best flavor. In another bowl, whisk together the wet ingredients. These are eggs, milk, and melted butter.
Now, it's time to mix the wet and dry ingredients together. Mix the dough until it's smooth and elastic. Then, knead it for about 10 minutes. Place the dough in a greased bowl, cover it, and let it rise in a warm place for about an hour. It should double in size.
After the dough rises, punch it down and divide it into 8-10 pieces. Roll each piece into a ball and flatten it slightly. Place a tablespoon of chocolate chips in the center of each disk. Fold the dough over the chocolate and seal the edges. Place the buns on a baking sheet lined with parchment paper, leaving about an inch of space between each bun.
Bake the buns for 15-20 minutes, or until they're golden brown. Remove them from the oven and let them cool on a wire rack for a few minutes. With these easy chocolate bun instructions, you'll be enjoying delicious homemade chocolate buns in no time!
Mastering the Perfect Dough
We're delighted to share our expertise on mastering the perfect dough for your homemade chocolate bun tutorial. Achieving the right consistency and texture is key. Our quick chocolate bun method will help you create delicious treats that impress everyone.
To start, kneading and proofing the dough are essential. Kneading develops the gluten, making the dough smooth and elastic. Proofing lets the dough rise, giving your chocolate buns a light and airy texture.
Kneading Techniques
Here are some tips to help you master the kneading process:
- Use a stand mixer with a dough hook attachment to make the process easier and faster
- Knead the dough for 10-15 minutes, until it becomes smooth and elastic
- Avoid over-kneading, as this can lead to a dense and tough texture
Proofing Tips
To ensure your dough rises perfectly, follow these tips:
- Place the dough in a warm, draft-free area, such as a pantry or cupboard
- Cover the dough with plastic wrap or a damp towel to maintain humidity
- Let the dough rise for 1-2 hours, or until it has doubled in size
By following these tips and techniques, you'll master the perfect dough for your homemade chocolate bun tutorial. Remember to be patient and gentle when handling the dough. With our quick chocolate bun method, you'll enjoy delicious, freshly baked chocolate buns in no time.
The Art of Chocolate Filling
We're excited to share our expertise on filling delicious chocolate buns with rich, velvety chocolate. This part of the recipe is super fun. With our tasty chocolate bun guidance, you'll make the perfect treat.
To start, use high-quality chocolate. This ensures your delicious chocolate buns taste deep and rich. Here are some tips to keep in mind:
- Choose a high-cocoa-content chocolate for the best flavor.
- Melt the chocolate to the perfect consistency for filling.
- Fill the buns with a generous amount of chocolate for the ultimate treat.
By following our tasty chocolate bun guidance, you'll create delicious chocolate buns that impress. Remember to have fun and be creative with your filling. It's all part of the process!
With these tips and a little practice, you'll be a pro at filling delicious chocolate buns in no time. Happy baking!
Baking Secrets and Timing
To make the perfect best chocolate bun recipe, focus on baking secrets and timing. We'll show you how to make your buns delicious and tasty.
Temperature and time are key when baking. For an easy chocolate bun recipe, preheat your oven right. Adjust the baking time as needed. Here are some tips:
Temperature Guidelines
- Preheat your oven to 375°F (190°C) for a standard best chocolate bun recipe.
- Adjust the temperature as needed based on your oven's specifications.
Visual Doneness Indicators
Look for visual signs to check if your buns are done. A golden brown color is a good sign. Here's a table to help you:
| Doneness Indicator | Description |
|---|---|
| Golden Brown Color | A perfectly baked bun should have a golden brown color on top. |
| Soft and Fluffy Texture | The bun should be soft and fluffy on the inside, with a slight crunch on the outside. |
Common Baking Mistakes to Avoid
To make sure your easy chocolate bun recipe is perfect, avoid common mistakes. Don't overmix the dough or overbake the buns. Follow these tips to make the perfect best chocolate bun recipe for your loved ones.
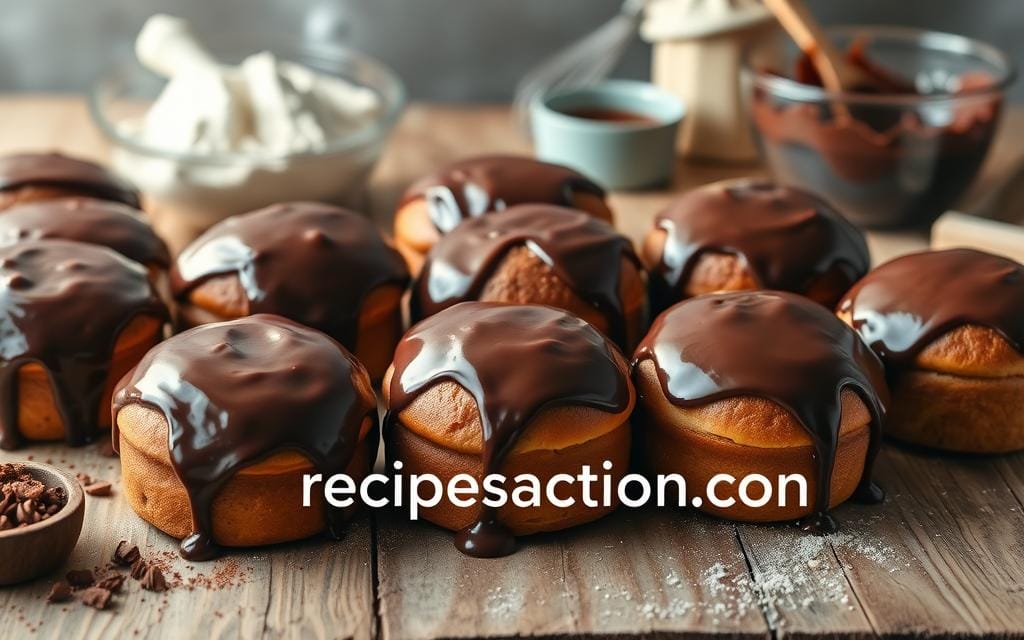
Decorating and Glazing Options
Now that we have our delicious homemade chocolate buns, it's time to think about decorating and glazing options. We believe that simple steps can make a big difference in how our buns look. In this section, we will guide you on how to create a beautiful and delicious homemade chocolate bun tutorial.
Decorating and glazing our buns is a fun and creative part of the recipe. We can use a variety of toppings, such as nuts, sprinkles, and chocolate shavings, to add an extra layer of flavor and visual appeal.
Basic Chocolate Glaze
To create a basic chocolate glaze, we will need some melted chocolate and heavy cream. We can melt the chocolate in a double boiler or in the microwave, and then mix it with heavy cream to create a smooth and creamy glaze.
Creative Toppings
In addition to the basic chocolate glaze, we can also use creative toppings to add an extra layer of flavor and visual appeal. Some ideas for creative toppings include:
| Topping | Description |
|---|---|
| Nuts | Chopped almonds or walnuts add a nice texture and flavor |
| Sprinkles | Colorful sprinkles can add a fun and playful touch |
| Chocolate shavings | Shaved chocolate can add a nice texture and flavor |
By following these simple steps and using our homemade chocolate bun tutorial, we can create delicious and beautifully decorated buns. These buns are perfect for any occasion.
Optimal Storage and Handling Tips for Chocolate Buns
Learn how to store and preserve your chocolate buns for maximum freshness and flavor, ensuring you can enjoy them at their best anytime.
Storage and Preservation Practices
| Storage Method | Details |
|---|---|
| Room Temperature (up to 3 days) | Store in an airtight container to keep them moist. |
| Freezer (up to 3 months) | Wrap each bun appropriate packaging, then place in a freezer bag. Label with the date. |
Reheating Instructions:
From Room Temperature:
Enjoy the buns as is, or warm them in the microwave for 10-15 seconds for a fresh-baked feel.
From the Freezer:
- Remove the desired number of buns from the freezer.
- Let them thaw at room temperature for about 1-2 hours.
- For a warm treat, preheat the oven to 350°F (175°C) and bake for 5-10 minutes until heated through.
Understanding the Magic of Chocolate Buns
We're excited to share the story of these tasty treats. Chocolate buns have a long history, dating back centuries. We'll give you a quick look at how they've changed over time. With an easy recipe, you can make delicious chocolate buns for any event.
Homemade chocolate buns are truly special. Here's why they're better than store-bought:
- Fresh ingredients: Baking at home lets you use the freshest ingredients. This makes your treats more flavorful and aromatic.
- Customization: You can make your buns your own with an easy recipe. Add your favorite nuts, spices, or chocolate chips.
- Satisfaction: Baking from scratch is rewarding. The joy of making delicious chocolate buns is unmatched.
The History of Chocolate Buns
Chocolate buns have a rich history in European baking. They've evolved over time, adding new flavors and ingredients. Now, we enjoy the delicious treats we know today.
Key Components of Perfect Chocolate Buns
To make perfect chocolate buns, focus on a few things. Use high-quality ingredients, pay attention to dough texture, and choose the right chocolate. Following a simple recipe and using great ingredients will make your buns a hit.
Conclusion: Enjoying Your Homemade Chocolate Buns
Now that you've learned to bake perfect chocolate buns, it's time to enjoy and share them. The smell of freshly baked buns will make everyone happy. You can give some as gifts to neighbors, co-workers, or loved ones. They'll love the homemade treat.
When you serve your chocolate buns, pair them with coffee or milk. It's the best way to enjoy them. If you have leftovers, don't worry. You can keep them at room temperature for 3 days or freeze for 3 months. Just reheat them to enjoy a warm, gooey treat.
Sharing your tasty chocolate bun guidance and best chocolate bun recipe makes you the top baker. Enjoy your homemade chocolate buns and make everyone smile with their delicious taste.
FAQ
What are the key ingredients needed to make chocolate buns?
To make chocolate buns, you need flour, yeast, sugar, and butter. Also, milk and high-quality chocolate are essential. Don't forget basic baking items like salt, eggs, and vanilla extract.
What type of chocolate is best for chocolate buns?
For the best taste, mix milk chocolate with dark chocolate. Milk chocolate gives a creamy sweetness. Dark chocolate adds a rich flavor.
How do I knead the dough properly?
Kneading the dough is key for the right texture. Start by flouring your surface. Use your heel to push and fold the dough. Do this for 5-10 minutes until it's smooth and elastic.
How can I tell when the buns are fully baked?
Check if the buns are golden-brown and sound hollow when tapped. You can also use a food thermometer. It should read 190°F (88°C) inside.
Can I freeze the baked chocolate buns?
Yes, you can freeze them for up to 3 months. Cool them down first, then wrap in plastic or foil. To serve, thaw at room temperature and reheat in the oven.
How can I make the chocolate buns healthier?
Use whole wheat flour instead of all-purpose flour for a healthier option. Reduce sugar and choose darker chocolate. Add nuts, seeds, or dried fruit to the filling for extra nutrition.